Showing posts with label nail art. Show all posts

Tuesday, December 9, 2014

Water Decals Transfers Crown Shield Rings Pattern

Gooood Morning!  Long time no see!  :)  Today I have something special for you.  Easy nail art courtesy of bornprettystore.com.  I'm sure most of you are familiar with Born Pretty.  They have awesome nail art at a really low price.  The only thing is that they ship from overseas so it can take up to a month to get to you.  They sent me some items to review and the first one I wanted to show you were these water decals.  

These were pretty easy to apply, however, I would not follow the directions on the package.  The package tells you to apply like a temporary tattoo.  If you apply it like a temporary tattoo, the gold metallic design would be facing down on your nail instead of being showcased on the nail.  Instead I just got a little cup of warm water, cut the piece I wanted to use out, let it soak in the water for about 10 seconds and tried to slide the decal off the paper.  The decal is not especially thin or fragile so you can use your fingers to place it on the nail wherever you would like.  Once you have it in place do not touch it.  Let the water dry and top coat it.  The decal will not stay without top coat.  And the decal will move around until you top coat it.  

I used a red creme as the base color and placed the decals over my nails.  For the most part you cannot tell where the decals are.  Look at how pretty!  I felt like an Indian princess with these nails!  

Born Pretty Item #T332

Born Pretty Item #T332

I really liked these water decals.  They were fairly easy to use once you got the hang of it.  And it steps up your nail art game!  Can't wait to try more.  I have a couple more items to share with you in the next couple days!  If you like this item you can click here or go to the Born Pretty store and search for item #T332.  Use my code: QFG10 to get 10% off your order.  

Sunday, July 6, 2014

4th of July Nails

So I'm totally late posting this.  But here is what I wore on the 4th.  I did a red, white and blue gradient and stamped over the gradient with stars.  I love the look of stamping over a gradient because you can do a crappy job on your gradient but it still looks bad ass once you stamp over it! I was pretty proud of myself.  What did you wear on your nails on the 4th?


Tuesday, January 28, 2014

Steampunk Nails

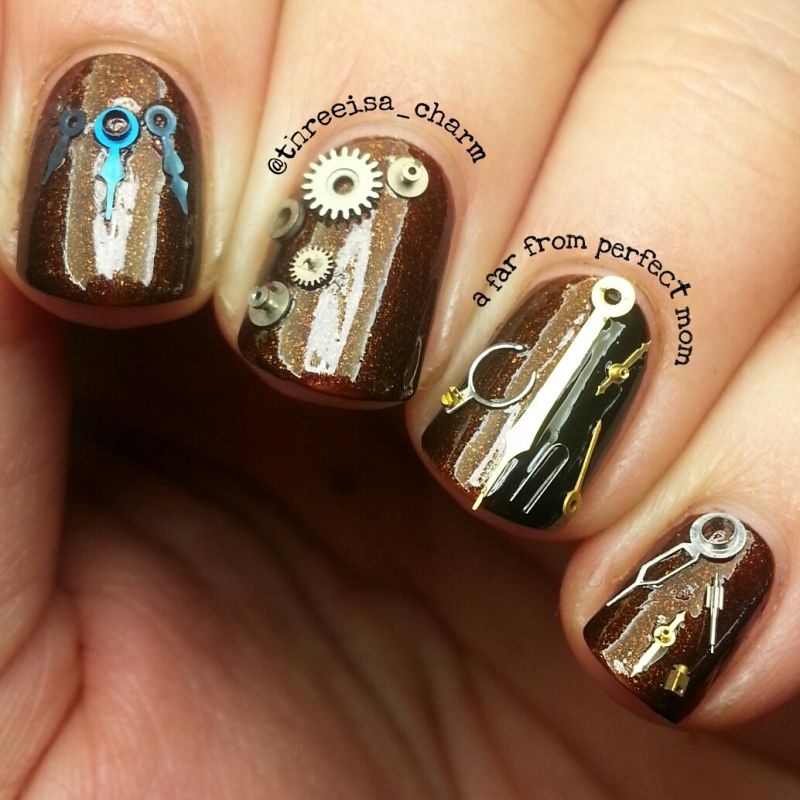
Short post today!  I attempted steampunk nails with my #nailquadsquad on Instagram.  And now two of them are contributors to Polish Etc!  So technically I can say they are blogger friends too!

Amy had a brilliant idea to do steampunk nails with the watch parts she acquired and sent to all of the quadlets.  I just recently learned about steampunk on pinterest when I saw the coolest steampunk watergun someone made from a cheap $1 watergun toy.  So I kind of knew what to go for.  Kind of a metallic dark look.  Honestly had no plan.  Just placed parts on my nails.  I think it came out pretty neat!  I used Orly Buried Alive for the base and on my accent nail I have half Buried Alive and half Essie's Licorice.

Steampunk nails

Tuesday, December 31, 2013

Happy New Years!

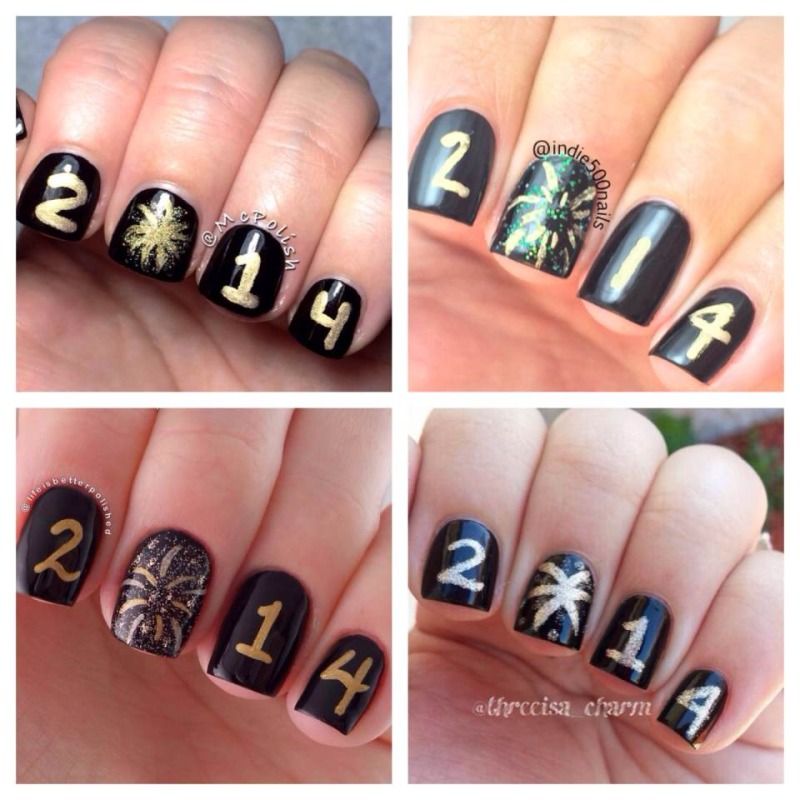
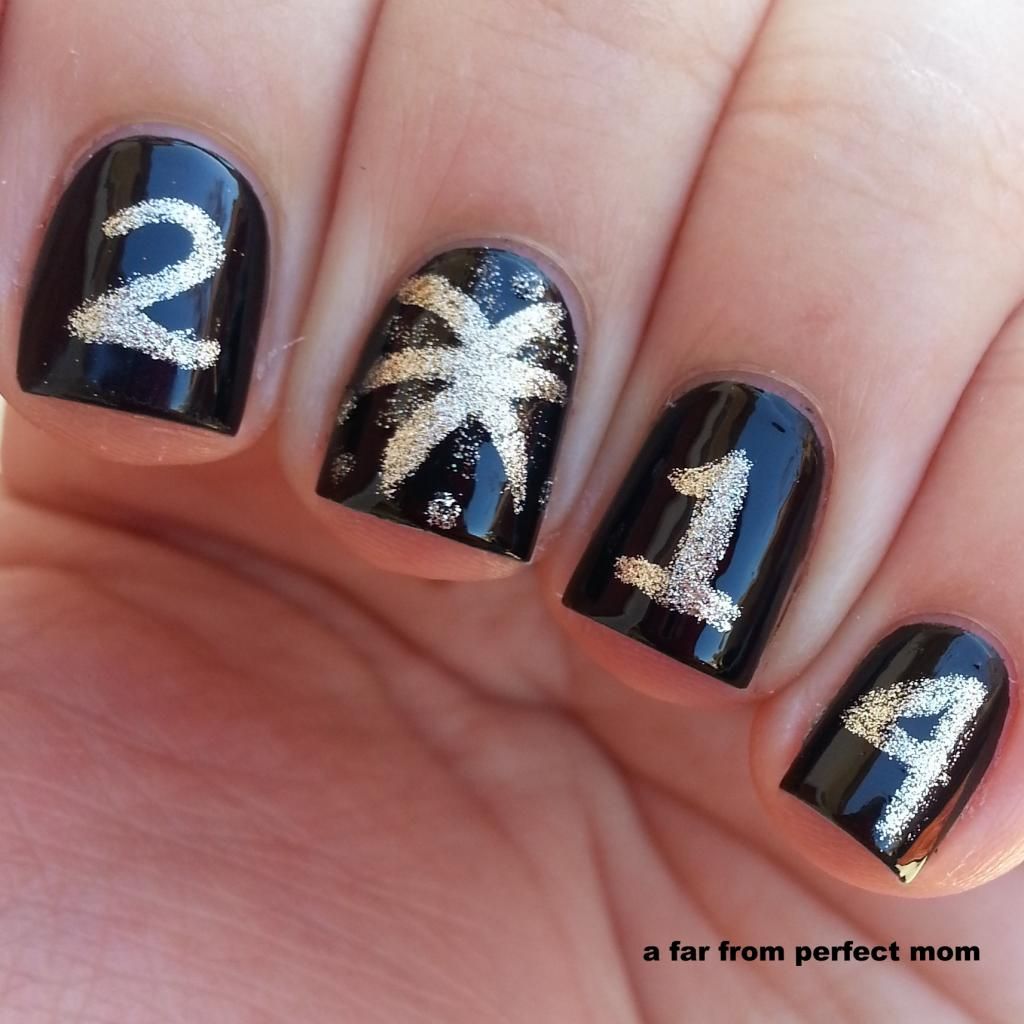
The last few weeks have been pretty hectic.  I changed my nails maybe once!  Also, winter has not been kind on my nails, they have been dry and brittle and keep breaking!  Wah!  Well, I had to do my collaboration mani with my #nailquadsquad (check out the tag sometime ;)) on Instagram so I wanted to share them here too!  I used my favorite black polish, Essie Licorice, as the base and Sally Hansen Golden-I to write the numbers and draw the fireworks.  I also tried to add China Glaze Angel Wings to the fireworks.  You can kind of see it.  :)  I think this is a totally cute and simple mani for New Years!  I hope everyone is having a great day and Happy New Years to you all!

Here is the collage for our collaboration.  I think we did pretty good copying each othere!  We were inspired by Instagrammers @madjennsy and @mrcandiipants!


And here is my solo shot.


Tuesday, December 24, 2013

Christmas Tree Nail Art

Merry Christmas Eve!!  I was planning to do more Christmas themed nail art, but shoot time escaped me.  I did these last week and posted them on Instagram.  I had the idea of using Sharpie pens as nail art pens because I remember seeing them on Pinterest so many times before.  I am not an artist, so I wanted to do the simplest design.  I drew what fellow Instagramer @reinovate called a "minimalist Christmas tree" on my accent nail and stuck a star glitter on top.  I also dubbed it the "Christmas poop tree".  Because my tree looks like a cartoony pile of poop.  I still think it looks pretty cool.  Sharpies are great for a quick nail art doodle, but if you plan on keeping your mani on for a while the ink seemed to fade as the days went on.  I used like 3 coats of top coat so I think the chemicals in nail polish disintegrates the ink.

Hope you enjoyed my Christmas Poop Tree!


Thursday, December 12, 2013

Red French Tips (Using a French Brush)

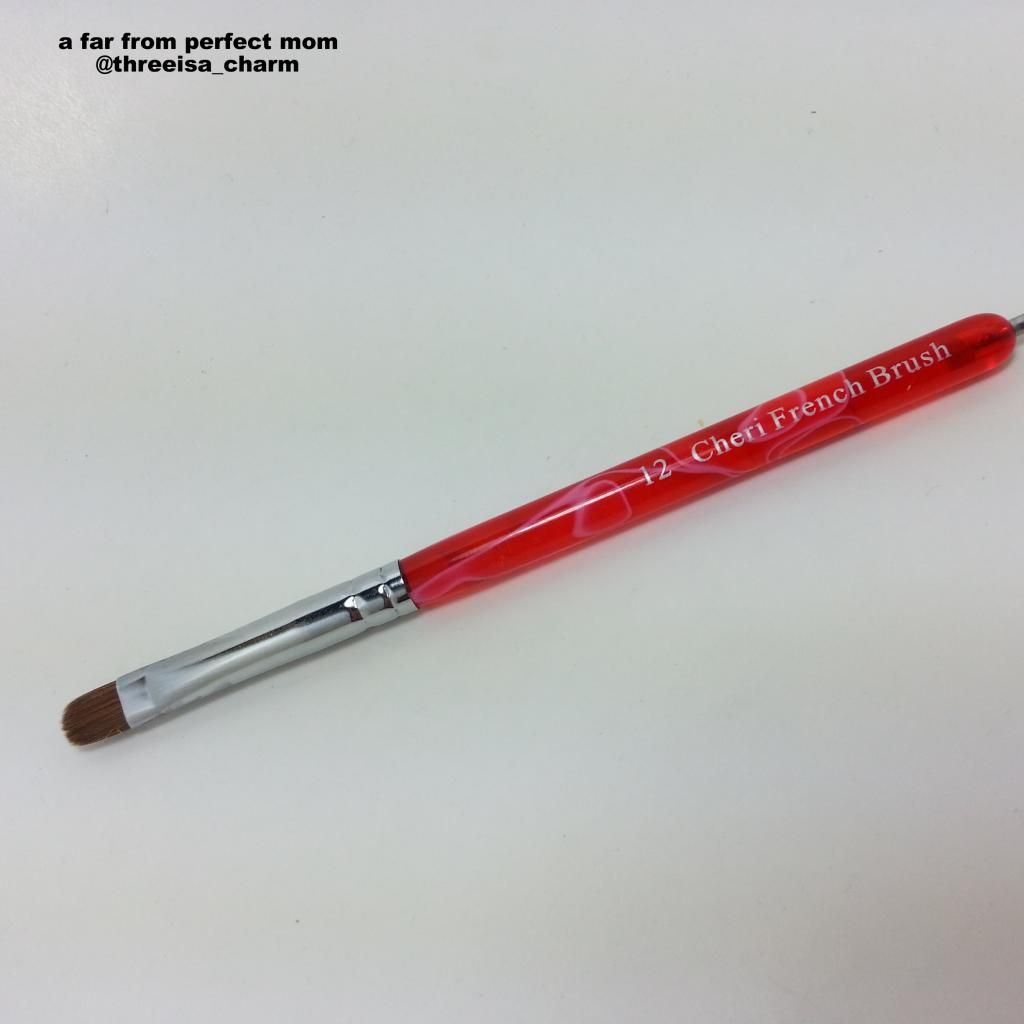
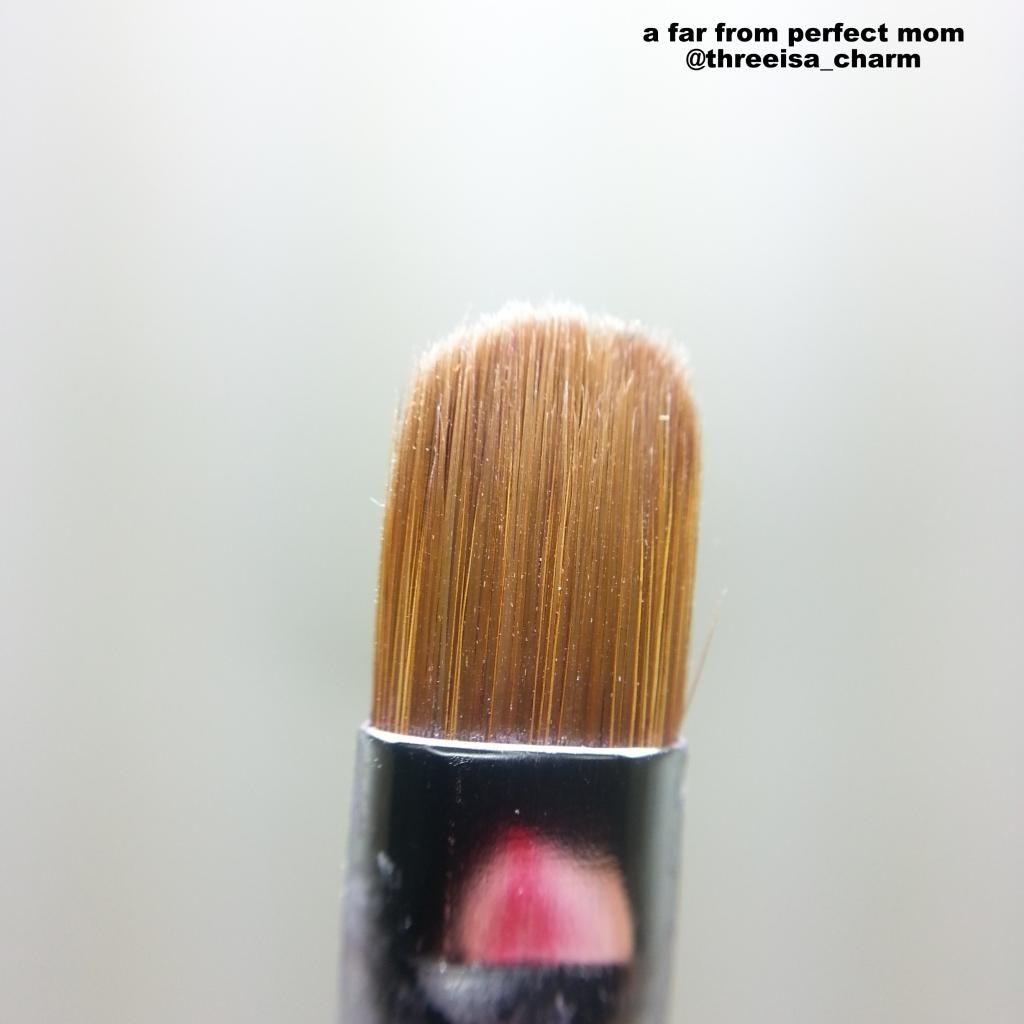
Hello again!  I am excited because a couple weeks ago I went with a few friends to go polish shopping at beauty supply shops and I found the perfect cleanup brush.  I saw a french brush in a bin at one of the stores and thought that it might make a good cleanup brush.  It seems that all polish girls are forever in search for the best cleanup brush and best top coat and I seem to collect both.  This brush was only $3, so I figured what is the harm?  Well, I loooooove it!  It is the best cleanup brush I have ever used.  My elf concealor brush melts in the acetone after only a couple weeks of use.  I have used this brush for several weeks and while bristles have gone astray on the whole it is still very well intact.  The edge of the brush is so thin that you can cleanup in the tightest of areas around your nails.  One of my friends Jess, Lost in Polish, pointed out that this is what the manicurists probably use for french manicures.  I didn't even think about that even though the brush has the words, "french brush" etched on the side.  So guess what I decided to try?  Well, I hope you can guess from the title of this post.

I took some pictures of the brush to show you what a perfect cleanup brush looks like.  The other end of the brush has a small dotting too.  I actually use this as part of clean up also.  Since the brush isn't very stiff, I push back my cuticles with the small dotting tool that way I can clean up the excess polish that gathered near my cuticle with ease.


The shape of the brush ends up being perfect for making that smile line for a french mani.


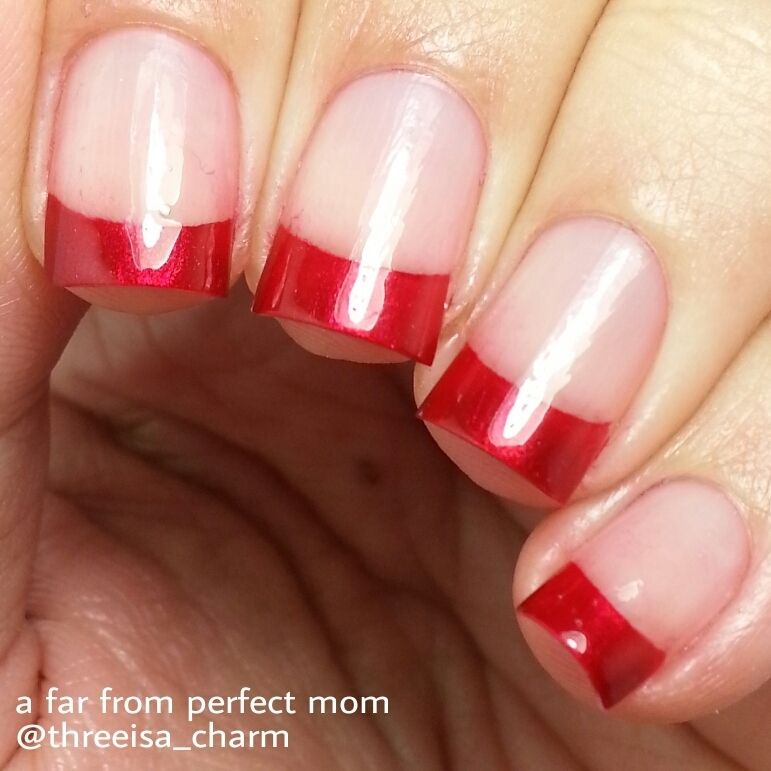
Look at my french tips!  It isn't perfect I know.  But these are the best french tips I have ever created (even my right had looked decent!).  Lol!  And in keeping with the holiday colors.  I thought I would do shimmery red tips! 

In order to create the french tips, I polished the tips with red polish pretty sloppily and then I dipped my french brush in acetone.  I tried to keep a good amount of acetone on the brush, not dripping wet but pretty soaked, then I placed the whole brush where I wanted my smile line and gently pressed down flat against my nail and swiped from side to side brushing away the excess polish to make the french lines.


Wow that was a wordy post!  Ironic since I do not like to read wordy blog posts.  What do you think of my french tips?  I would tell you the name of the red polish, but I got this in a Color Club pack from Ross and threw out the box.  I'm so sorry, if anyone can name it please let me know!  It seems like a metallic Santa red polish.

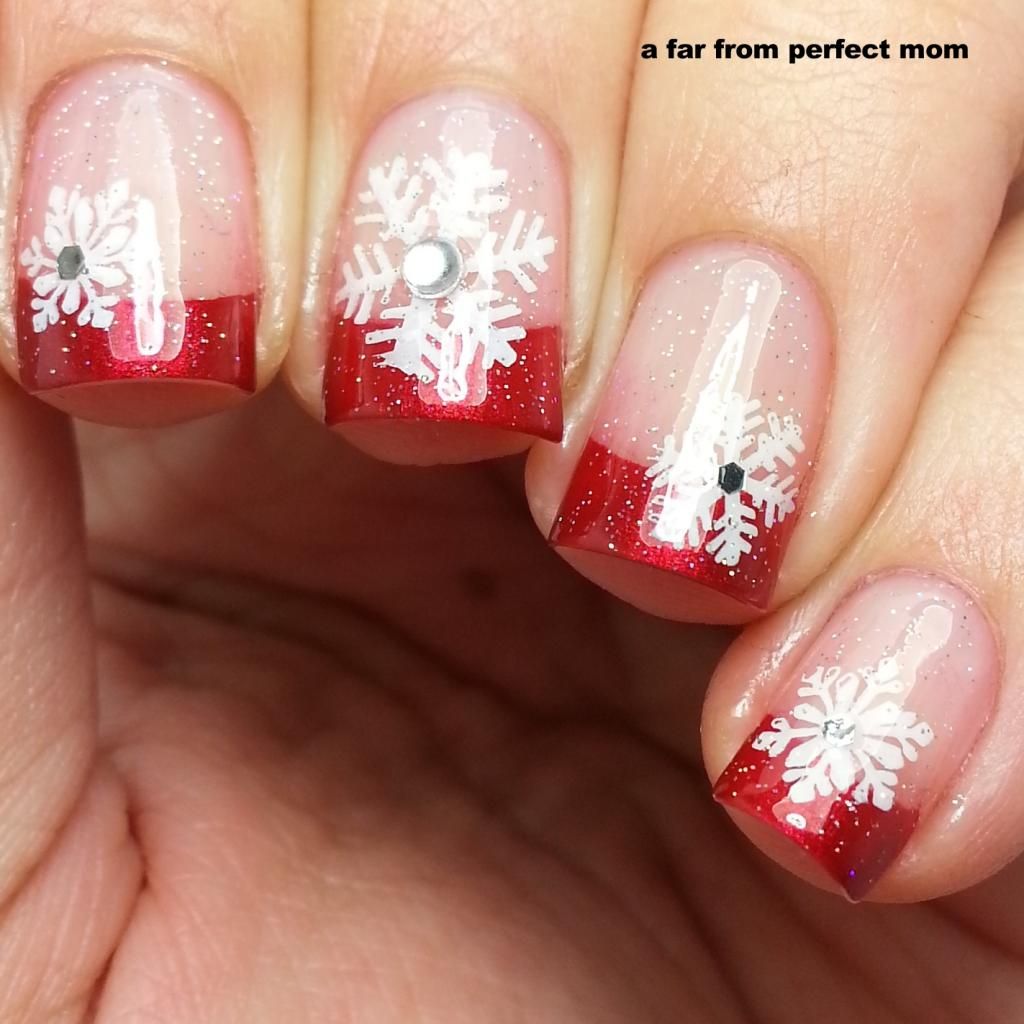
*Update*  Look at how I updated my mani!!  I love this so much.  I'm not very good at nail art, but I'm proud of myself for this.  Hahaha!  I used my Winstonia Plates for the snowflakes.


Monday, July 15, 2013

Nail Art: Galaxy Nails!

So lately I have been having a lot of fun attempting to do nail art.  I always wanted to do nail art, but it is rather time consuming and I have ADHD and can't ever find the time.  But because I met some amazing ladies on Instagram who love polish just like me that do this with me they motivate me to follow through!  Every two weeks we attempt a new (to us) nail art technique.  And so far every time we collaborate it comes out brilliantly!  We call ourselves the #nailquintcrew.   You know...because there are five of us. :)

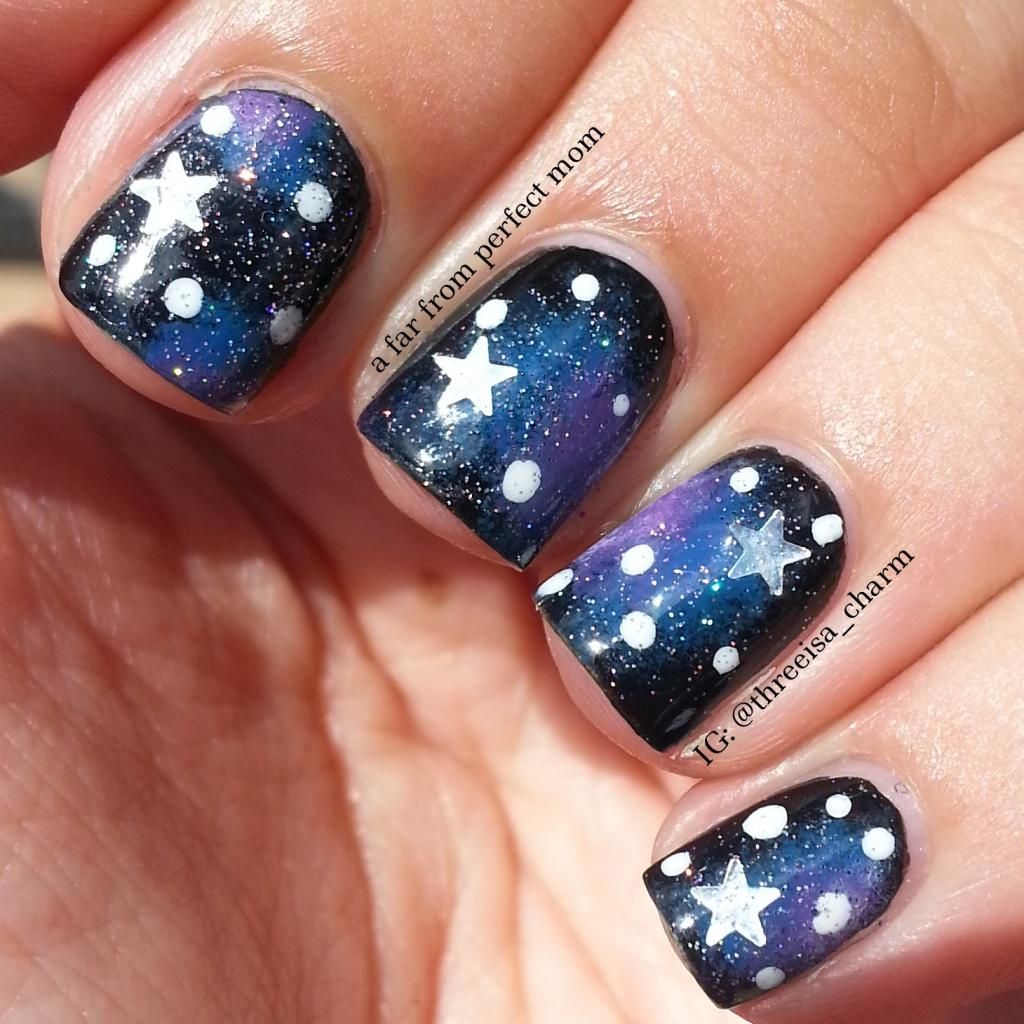
The last time we collaborated we tried galaxy nails.  I was nervous about it, but I've seen many many many ladies attempt galaxy nails and they always come out looking amazing!  It's pretty easy, a little time consuming, but the results are pretty fabulous!!!  

For my galaxy nails I used a black base and sponged blue and purple polish.  I also used a star glitter polish for the stars.  I pretty much just picked them out with a toothpick and placed them on the nails.  I finally topped it off with China Glaze Fairy Dust.  I apologize but that is the only polish name that I remember.  :/

My galaxy nails!

This mani looks pretty cool in pictures, but looks so freaking awesome in real life!  I love simple nail art that looks great.

Thursday, June 27, 2013

New Display: Fing'rs Heart 2 Art Collection sighting @ Wal-mart

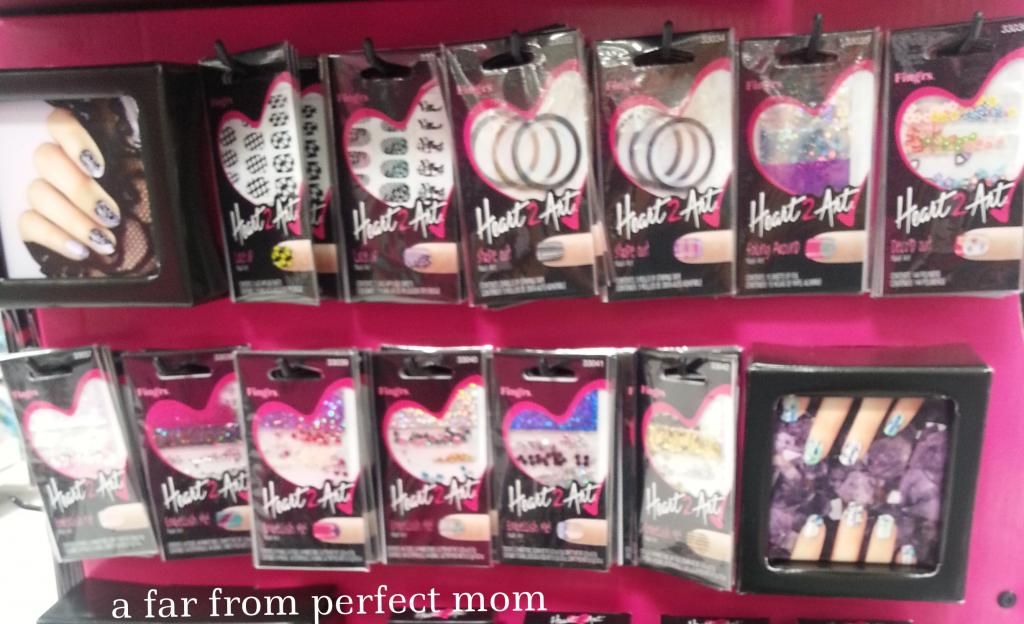
I was so excited because I was shopping at Wal-mart and while checking the polish section I found something fun!!!  :)  Usually my Wal-Mart is super slow at putting up new collections, but today I saw them putting up a new display of nail art products that wasn't already on my radar.  Literally the lady was assembling the display and placing product.  It was for a new collection from the Fing'rs brand called Heart 2 Art.  There was so many new products!   Here are a few things that I spotted.  I felt really weird taking pictures because the lady was still assembling the display and it was in the middle of the walkway at Wal-Mart.  So the pictures are blurry and I missed a lot of stuff too.  I did all this so I could have something to post on here and Instagram!  You're welcome!

They have some nail art tools including that dotting set and a set of nail art brushes too (not shown).  So exciting!  And if you ever wanted to try OPI Spotted they appear to have a dupe of that polish!  
Dotting tool and polish set and a spotted polish set.
Stripping tape, nail stickers, glitter and nail accessories!!!

Nail accessories
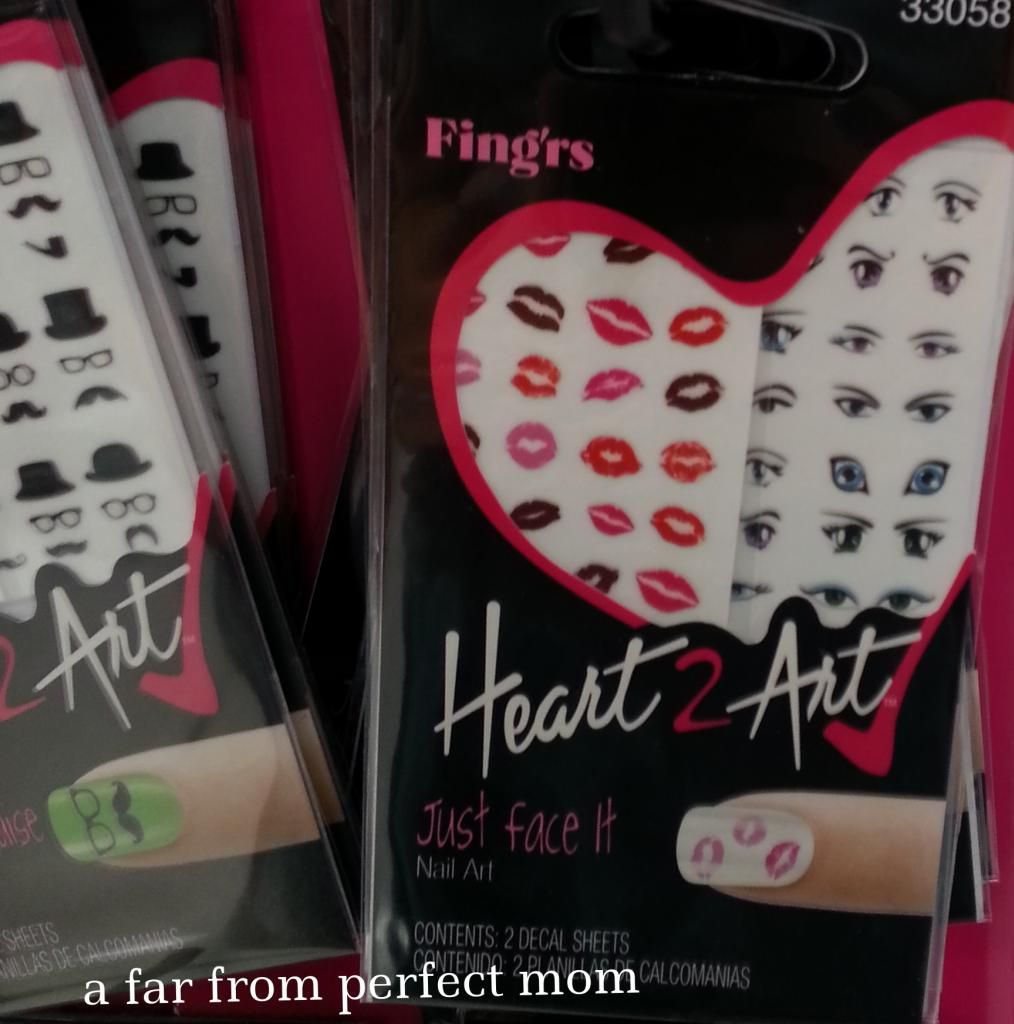
Nail art decals.  They had some really cute ones!!

Nail Decals!

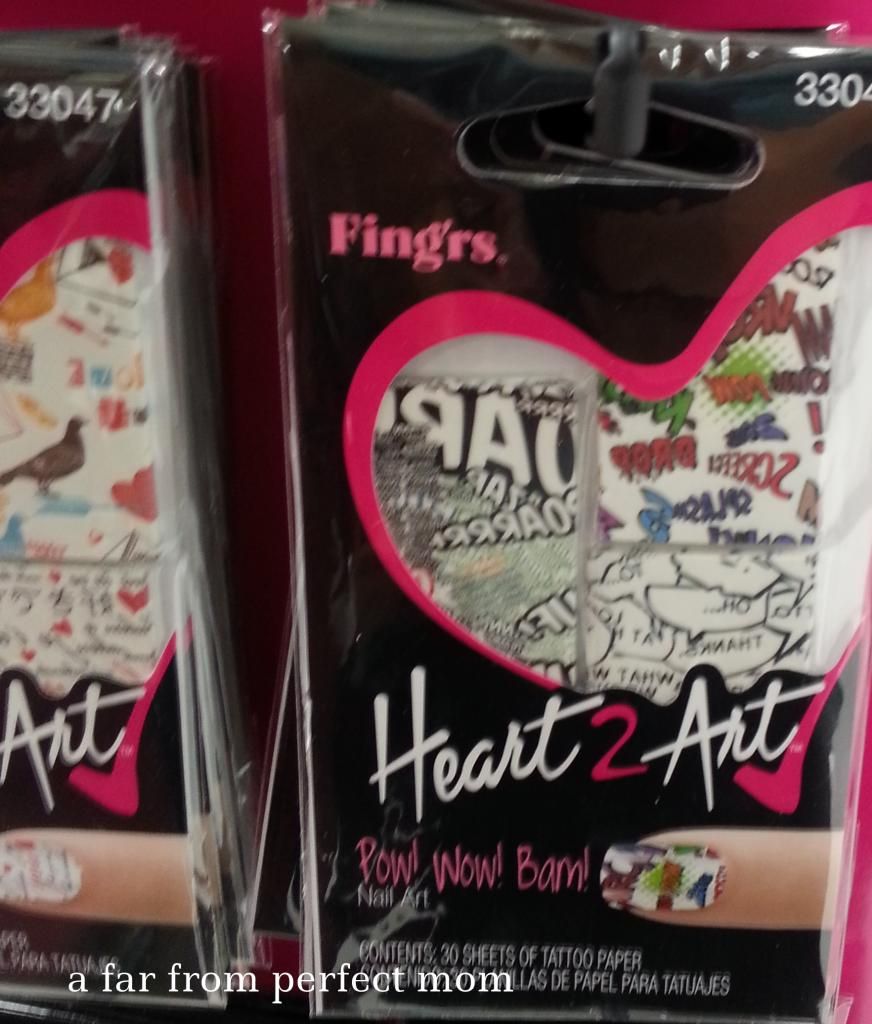
Nail Tattoos!  How cool!!

Nail Tattoos!
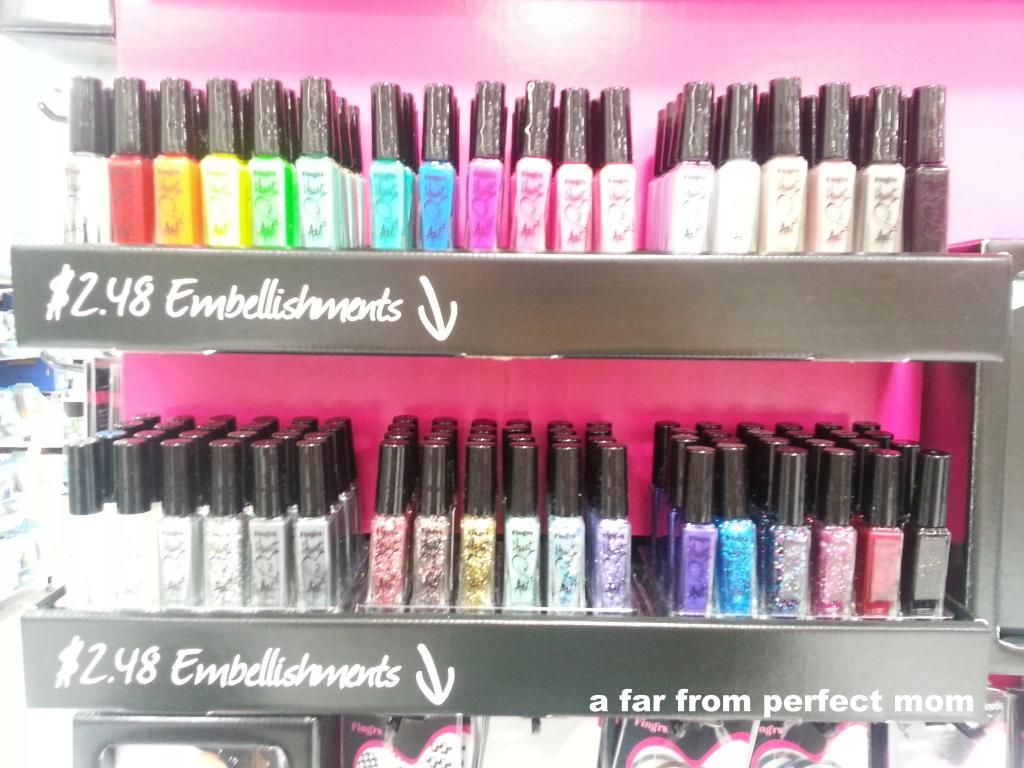
And polishes!  I thought these were nail art polishes with a striping brush, but they weren't.  Well at least the bottom row wasn't.  And I spotted something interesting in this bunch.  They had awesome looking glitter toppers!  These polishes are on the small side, almost mini, 0.29 fl oz or 8.8 ml.  

These are $1.68 not $2.48.   The accessories under are $2.48 I believe.

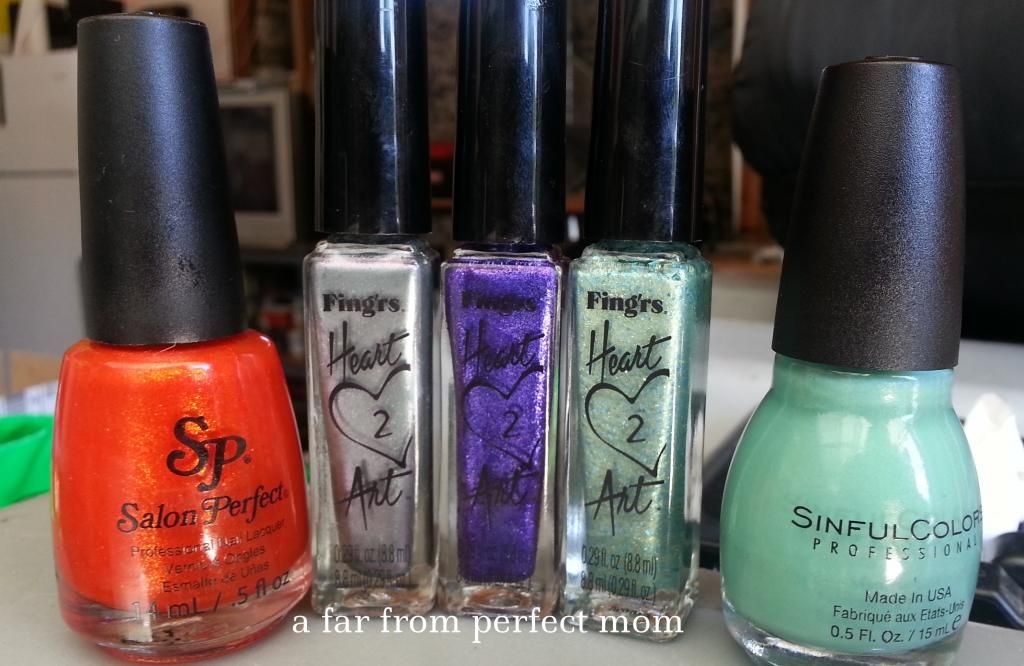
These are the polishes I got at Wal-Mart.  I didn't have Sinful Colors Mint Apple and that Salon Perfect Light My Fire looked stunning.  Been seeing a lot of orange with gold shimmer polishes lately and I wanted one too!!!  So the three Heart 2 Art polishes I got were (from L to R) Stop Metalling In My Business, V.I.Purples, and In Mint Condition.  Now Stop Metalling In My Business and In Mint Condition appear to be dupes for Deborah Lippman's Wicked Game and Mermaid's Dream.  Actually I'm not sure about Stop Metalling In my Business being a dupe, it is similar though.  It looks like a grayish green with a purple duochrome polish.   

My Wal-Mart polish haul.

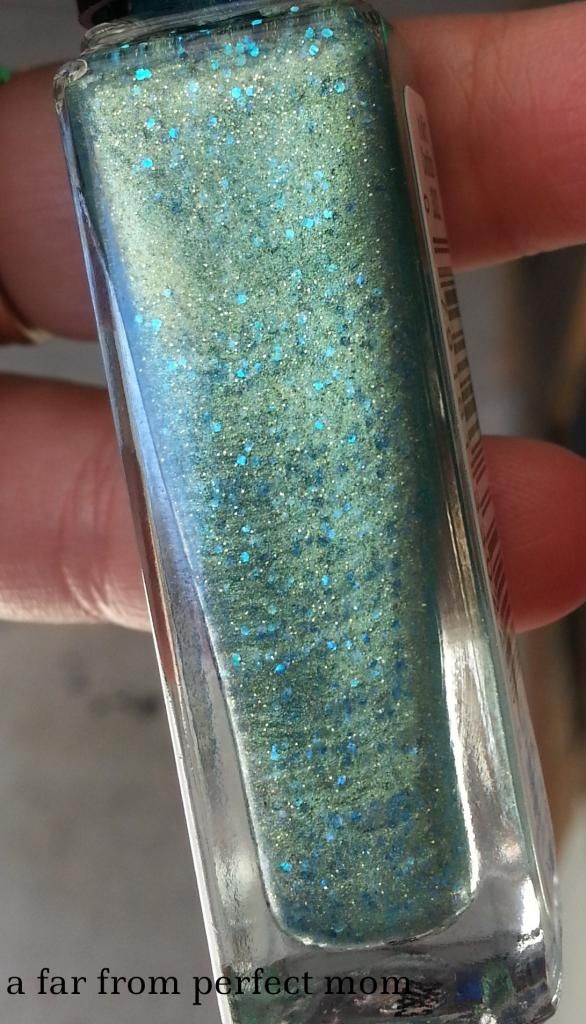
Here is a close up bottle shot of In Mint Condition.  I don't have the Deborah Lippman to compare, but it certainly reminded me of it!  And after bringing this home I googled it and all the pictures make this look like a pretty good dupe.  


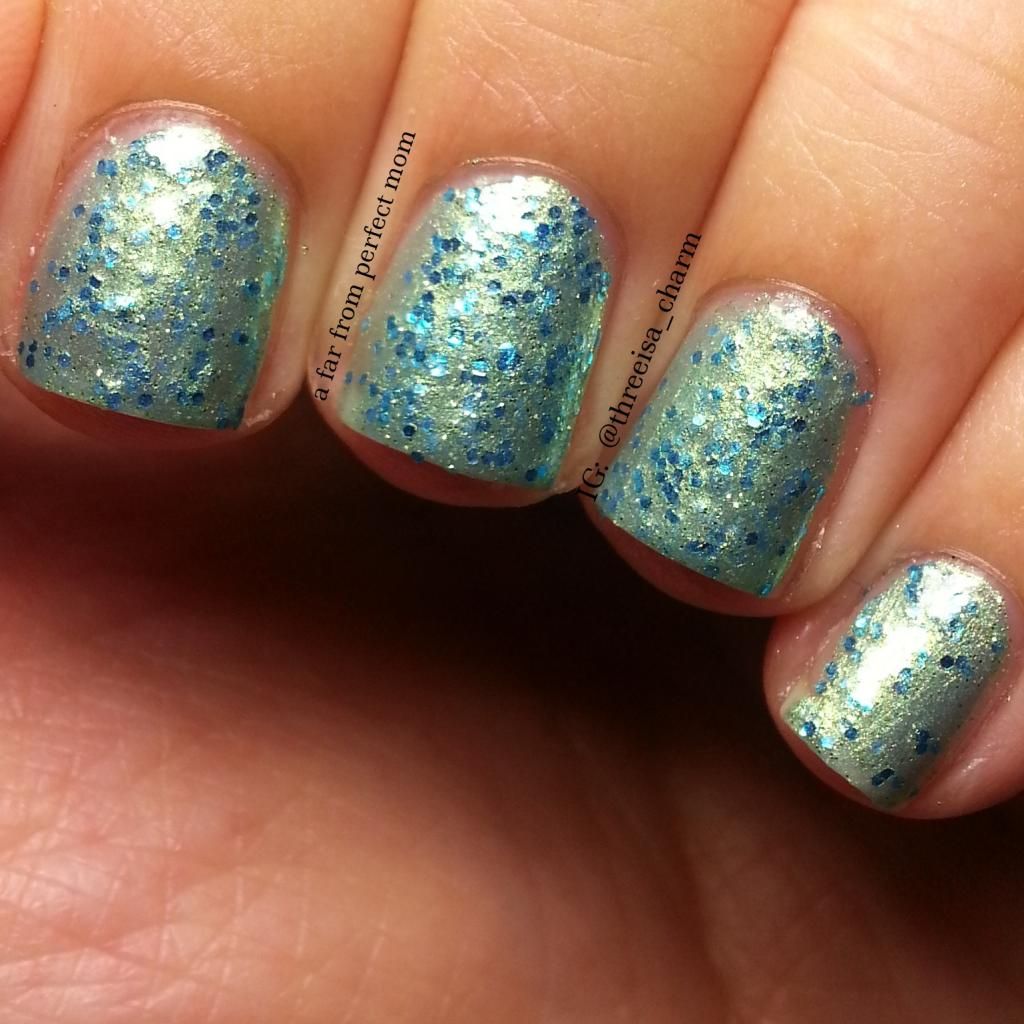
Well, I decided to wear it as a mani.  Here is my swatch of In Mint Condition.  This is two coats.  Thinner coats seem to work better with this polish.  What do you all think?  Dupe?  I have looked at a dozen other swatches and this seems a little more dense with blue glitter.  

Swatch of Heart 2 Art In Mint Condition
Confession.  Every time I saw a swatch of this polish I kind of hated it.  There have been some really good swatches that made the DL look kind of nice, but I didn't do that great of a job and I'm still not a fan.  Lol!  The polish hoarder in me just wanted a dupe of a high end polish.  This polish was $1.68!  I don't care that I don't like it! 

Sunday, February 3, 2013

Julep's Sally and Joan Half Moon Mani Nail Art

I'm attempting nail art.  It has not gone well for me at all today.  I'm not disappointed with the end result. Just disappointed with the whole process!  Ugh, I always respected the ladies who did awesome nail art knowing that I'm not one for nail art.  But this put that respect on a whole new level.  I was inspired by a youtube video made by the brains behind the Let Them Have Polish blog.

I used the two polishes that I recently got in my February Julep Maven box.  The colors were Sally, described as an antique ivory, and Joan, described as a raspberry plum with rose gold shimmer.  They were inspired by the great actresses Sally Field and Joan Crawford!

I have to say Sally was being very very very tempermental.  I love love loved the color.  I thought it looked so delicious in the bottle, like vanilla ice cream!  But when I applied it it was streaky, thick and goopy.  It wasn't leveling out and it was making me sad.  Plus it took forever to dry.  I had no choice but to add thinner.  I believe I added like 12 drops of thinner.  Which is a lot considering this is a smaller bottle!  But after that Sally was behaving so much more nicely.  The color is just amazing on my nail!


Here is Sally alone on my nail.  So pretty!

This is Sally without the flash of my camera.  Makes my
fingers look nicer. 

Then I attempted the second color Joan.  It is such a beautiful color.  The gold shimmer look like gold flakies.  I can't tell you how many times I messed up this mani.  I wanted to cry.  I kept smudging everything and gouging chunks of polish off.  And the top coat picked up a little bit of the color and spread it all over my nail.  I had to do a bad paint touch up on the half moon part.  You can see it on my middle finger.  Well kind of.  If I had blown up the picture you would have been able to totally see it.


Here it is without flash.  I really liked the end result.  


With flash.  This picture is a little more color accurate.  


I also used the new Polymer Freedom Top Coat that I got in my Julep box.  This top coat claims it is like a gel manicure, and it even uses light to cure.  I was really excited to use this top coat.  I used it on my mani when I first got my box because I was so excited and it was great!  It dried a whole lot faster than I thought it would considering that I just used the light from my lamp.  It was easy to apply and very glossy!  It definitely gives my all time favorite Seche Vite a run for it's money.  

For this particular mani, I needed to be a little more careful with application because it did pick up some of the red and spread it across my half moon section.  That was a such a buzz kill, but typical of most top coats.   Also, it does seem to have a little shrinkage like Seche Vite.  I was hoping that it wouldn't, but I'm inpecting my nails as I type and I can see the polish retracting ever so slightly.  I  still really like this because it is 4-free whereas Seche Vite does have a harmful chemical in it.  So I've been searching for a 3-free fast dry top coat that comes close to the action of Seche Vite.  So far, Julep's Freedom comes really really close and I'm definitely going to be getting back ups of this!  Keep in mind this might not be best for sealing in nail art, I think Seche Vite is still the best for that.    

I'd love to know what you think of my attempt at nail art.